
- Visual Automation framework for pixel perfect migration and re-platforming
- API test automation with Playwright
- Visual Website Testing at Scale: Introducing the Sitemap.XML Feature
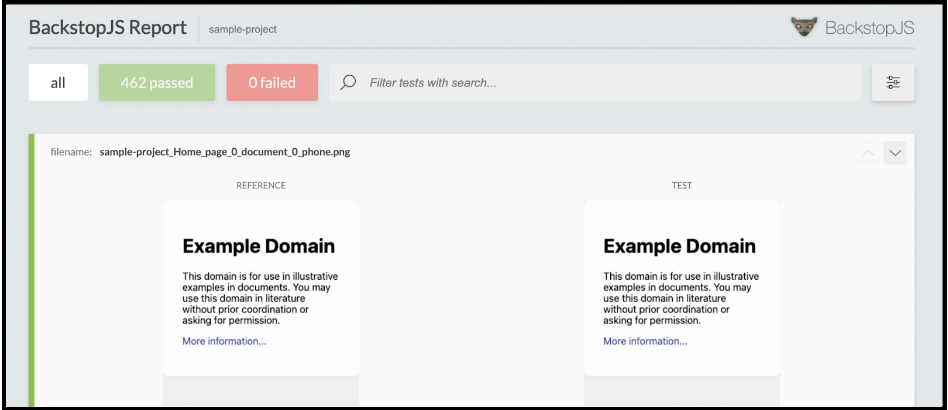
Our QA team recently developed a Visual Automation framework, utilizing BackstopJS for streamlined pixel-by-pixel testing. This framework compares screenshots of new and legacy websites at all viewports to generate a report.
Maintain the visual appearance of your website with our Visual Automation framework, during migration and replatforming projects.
Visual Automation framework capabilities
- Ensuring to maintain the visual look and feel of websites, while new deployment does not break any UI element.
- Replacing the manual visual testing process with an aim to save time and efforts for QA.
- Parallelization of responsive visual testing.
Pros of Visual Automation
- CI integration for the production environment: Visual Automation integrates with the Continuous Integration (CI) system. Such a configuration for the production environment ensures the integrity of User Interface (UI) design as Visual Automation script runs at every code commit or pull request.
- Time saved: Automated testing runs 1000s of URLs, while consuming less time compared to manual visual testing.
Cons of Visual Automation
- False Alerts: Visual Automation may raise false alerts of testing failure in case of inconsistent elements in UI or other network issues.
- Increased maintenance cost: Visual Automation costs rise with CI integration usage. E.g., if you use GitHub, you may get 2000 CI/CD minutes per month. Refer to the GitHub pricing for assessing the costs.
Running the Visual Automation framework
Running the Visual Automation framework requires input from a CSV file.
You make entries for URLs of both, the new (base URL) and legacy (reference URL) website as input in a CSV file. It gets input from the CSV file and runs the script. It checks the URLs visually and performs comparison for every URL of the new site with the corresponding URL of the legacy site.

The Visual Automation framework generates an HTML report, which contains a comparison of screenshots from both sites, placed adjacent so that you see the results for all the viewports.
Installation and configuration
The use of Visual Automation framework is a straightforward process. Clone our repository for Visual Automation framework. If you use a CSV file for input, enter all your URLs.
To install all dependencies, run the command “npm install”.
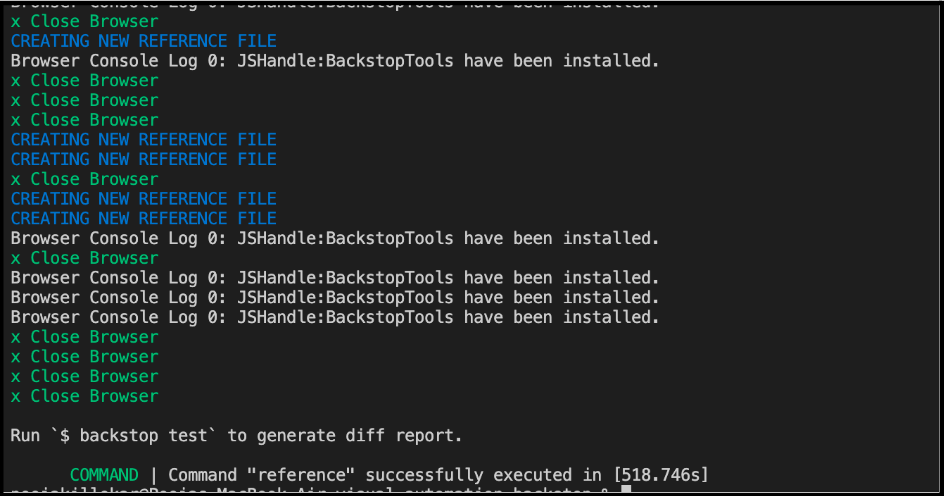
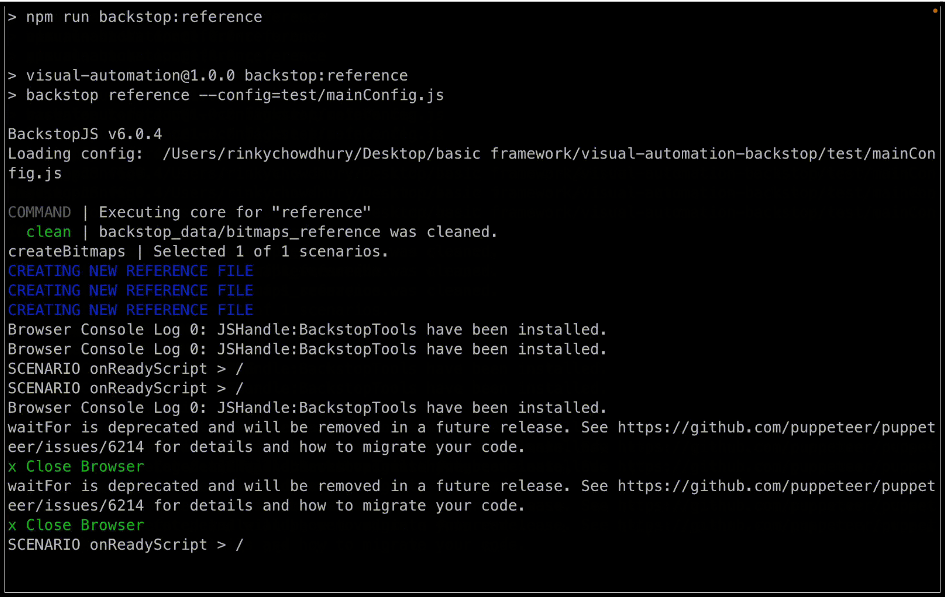
Next, create a reference screenshot by running the command “npm run reference:csv”. As a result, URLs from the CSV file are parsed into the JSON file and reference screenshots are created from referenceUrl.
Now you need to create a reference screenshot, just run “npm run reference:csv” command. It parses the URLs from CSV into JSON and, it makes the reference screenshots of referenceUrl.
On executing the command “npm run reference:csv”, the CLI terminal displays the output, as shown below.
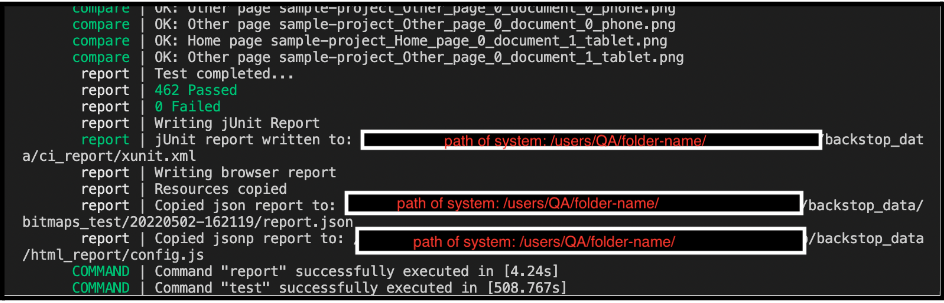
The next step is to execute the command “npm run test:csv” for testing the given URLs. As a result, URLs are fetched from the JSON file and compared with reference screenshots.
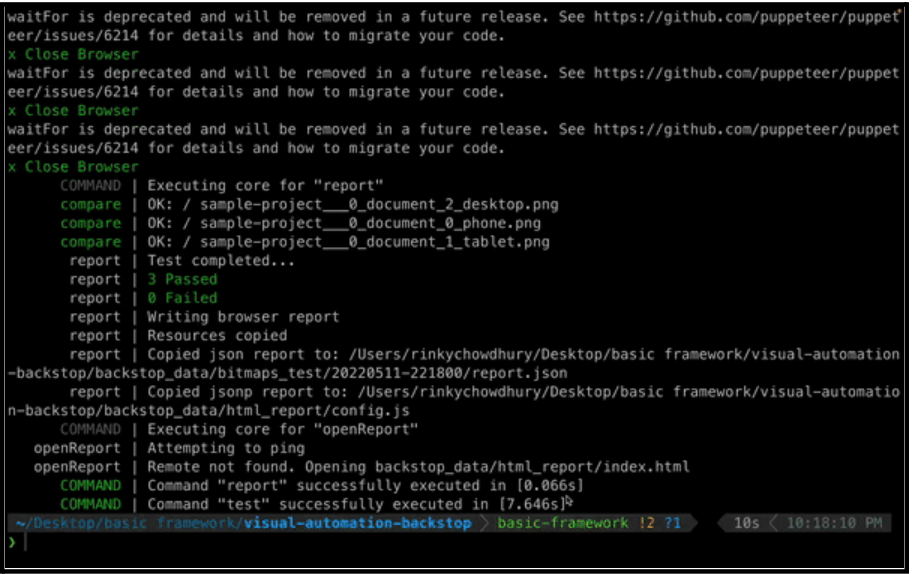
On executing the command “npm run test:csv”, the CLI terminal displays the output, shown below.
How we use the Visual Automation framework
At rtCamp, we have been actively using the Visual Automation framework. Some use cases include:
Migration Projects
Visual Automation framework particularly matches with requirements for migration projects. During the execution of such projects, we take reference screenshots of the production site. We conduct extensive visual tests by comparing development UI with production site UI using the test command.
Internal Projects
We implement CI integration for all the internal projects. Visual Automation framework runs on every instance of pull request (be it plugin update or new functionality). It ensures that no breaking change occurs before merging of pull requests.
Benefits of Visual Automation framework
Looking ahead, Visual Automation framework can immensely benefit migration and replatforming projects. It saves time compared to the manual testing process and assures delivery of bug-free applications.
It enables the identification of visual changes quickly and efficiently without going through the application manually. Go ahead and try our Visual Automation framework.
You can learn more about our Quality Assurance team here or get in touch with us right away.