Laying the Foundation for Kentico to WordPress Migration
For any migration project to be a success, it’s important to understand why you considered migrating away from your current CMS(Kentico) in the first place. You also need to understand what considerations you need to make before to move to a certain CMS—WordPress, in this case.
That’s why your discovery stage starts by identifying the core reasons and needs for migrating from Kentico to WordPress, and documenting them for future evaluation.
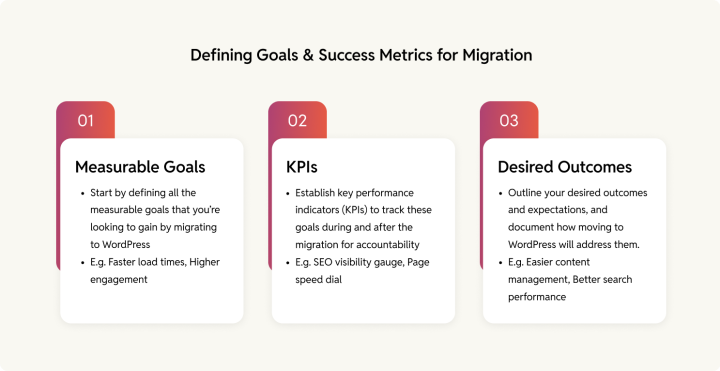
Start by defining all the measurable goals that you’re looking to gain by migrating to WordPress. These could be reduced maintenance costs, faster load times, improved website design, increased organic traffic, higher engagement, ease of use, and better scalability.
Next, establish key performance indicators (KPIs) to track these goals during and after the migration for accountability. For example, if you’re migrating for SEO concerns, evaluate your site’s current search visibility.
Also, outline your desired outcomes and expectations, and document how moving to WordPress will address them.
The discovery phase essentially helps you understand everything that needs to be moved to your new CMS. There are many parts to the discovery stage—let’s look at them one by one, starting with evaluating your current CMS setup.
Evaluate your existing Kentico setup
Kentico currently supports two versions of their Digital Experience Platform (DXP): Kentico Xperience 13 and Xperience by Kentico.
Identify the version you’re using and create a feature matrix that compares Kentico’s capabilities with those of WordPress. This matrix should document critical functionalities that must be retained in the migration, as well as features that can be dropped or replaced to optimize your WordPress setup.
| Features | Needs |
| Headless architecture | |
| Multilingual support | |
| Personalization | |
| E-commerce capabilities | |
| Contact forms,Lead magnet and Newsletter form | |
| Content Scheduling | |
| Analytics | |
| Workflow customisation | |
| SEO features | |
| Cookie consent management | |
| User roles | |
| Plugins and integrations |
Continue adding elements to this list based on your Kentico setup.
This step helps you understand all the Kentico features you’re going to need to rebuild on WordPress. When we get to the actual migration step—specifically when we migrate your Kentico backend to WordPress—we’ll use this list to ensure feature/function parity.
Also, it’s important to plan how you want the new layout to appear on WordPress—whether you’d prefer to retain your current design or opt for a redesign. Your decision will adversely impact both the timelines and project scope. So it’s crucial to make this choice early in the process.
Review third-party integrations
If you’re using third-party integrations with your Kentico setup, document them to ensure smooth migration. For example, you might use Google Analytics for tracking web performance.
Access your Kentico dashboard and list all connected applications and their key capabilities. This will help you identify which features need to be replicated in WordPress, allowing you to install or develop the necessary custom plugins / API’s during migration.
| Third-party integrations/ functions | Kentico | WordPress |
| Analytics integration (Google Analytics) | Google Site Kit | Google Site Kit |
| Content Delivery Network (CDN). | Built-in support for CDN to improve load times | Integrate CDN services (e.g., Cloudflare) to optimize content delivery globally. |
| Salesforce marketing cloud | Offers built-in two-way integration with Salesforce, allowing synchronization of various data types, including contacts and leads. | Requires third-party plugins (e.g., WP Fusion, Zapier) for Salesforce integration, which can vary in functionality and ease of use. |
| SEO management | Built-in | Multiple plugin options like Yoast, Rank math, AIOSEO etc |
| Forms management | Built in (via Kentico’s Form Builder application) | WPforms or Gravity forms |
| Multilingual support | Built in | Available via WPML (a WordPress multilingual plugin) |
Comparing Kentico and WordPress user roles
Both CMS Kentico and WordPress have different roles for users, corresponding with different functionalities and limitations.
Kentico
- Editor: Has access to the administration interface, but the editor cannot give out permissions.
- Administrator: Has unrestricted access to non-global applications for all sites in the system.
- Global administrator: Has complete access to all parts of the website.
WordPress
- Subscribers: Can only view content and manage their own profile.
- Contributor: Can only edit and delete posts.
- Author: Can only control posts, not pages.
- Editor: Have full control over posts and pages, but they can’t access themes or plugins.
- Administrator: Has complete access to all features of the website.
Beyond these, there may be custom roles on each platform.
During migration it’s important to transfer all the roles along with the right permissions. User data is generally part of the content migration phases whereas custom coding roles and permissioning lies with the backend migration team.
Understanding the nomenclature differences between WordPress and Kentico
| Kentico | WordPress | Description |
| Pages | Posts | Used for posting blogs, articles, etc. |
| Page type | Pages | To create and organize main pages like “service”, “product” etc. |
| Application | Plugin | To bring additional features and functionalities for managing the site. |
| Administration interface | Dashboard | The main control panel for managing WordPress and Kentico sites. |
| Translation service | Multilingual support | To support regional languages by translating the content for your website. Useful for reaching wider audiences and streamlining content management. |
| Page templates | Themes | To control and manage the site’s appearance and layout. |
| Macros | Shortcodes | Used for inserting predefined text or codes. |
| Page builder | Gutenberg editor, Elementor etc | This functionality simplifies content creation and layout management. |
| Navigation | Menus | Organizes the site’s menus and handles navigation within the website. |
| Versioning | Revisions | To track post and page changes. |
Audit your content
A thorough content audit ensures that only relevant, optimized, and up-to-date content makes it to your new WordPress stack. Start by identifying the different types of pages on your Kentico website. Keep in mind that page types vary depending on your Kentico version:
For versions below 13:
- Standard page type
- Content-only page type
- Container page type
For version 13 and Xperience:
- Structured pages
- Pages with page builder
Create a list of all the page types you’re using.
When the migration process begins, you’ll have to map your different Kentico page types to corresponding structures in WordPress (through custom page templates, if needed).

Sorting your content
When you review your content in Kentico, you may come across old outdated, ghost pages, or duplicate content that doesn’t need to be migrated. Doing an audit of your content before migration can help a lot to speed up the Kentico to WordPress migration process and reduce clutter on the new site.
Note your taxonomy
Review your current taxonomy setup, as Kentico uses a classification or tagging system that differs from WordPress. Plan a direct mapping of your categories and tags to ensure a seamless transition and avoid confusion post-migration.
Kentico provides three types of categories:
- Personal categories
- Global categories
- Site-specific categories
Keep track of all the pages and their categories, and ensure to follow proper labeling techniques, to avoid data loss during migration.
For example, if your Kentico site has a “Product” custom post type with multiple subcategories like “Software” and “Hardware.” In WordPress, you can replicate this using a custom post type for “Product” and custom taxonomies to manage the “Software” and “Hardware” classifications.
Understand Kentico’s taxonomy system
Kentico provides a combination of custom modules, hierarchical trees, and document types to organize content. As stated in Kentico’s documentation, taxonomies are to be used to break down content into groups based on their shared characteristics, allowing for structured organization through categories and subcategories.
The hierarchical taxonomy structure in Kentico allows for parent-child relationships among categories, which can be used to filter content and manage visibility based on user roles. Although, it can complicate transitions due to its complexity.
For example, as shown in the image below, “Store” contains coffees, brewers, and accessories, each with its categories or tags.

Understand WordPress’s taxonomy system
WordPress offers a simpler taxonomy system that revolves around categories and tags, with the option to create custom taxonomies for more complex needs. Recreating Kentico’s intricate hierarchical structure often involves:
- Setting up custom post types (e.g., “Products”, “Store”)
- Creating hierarchical custom taxonomies to replicate parent-child relationships
Plugins like Secure Custom Fields (SCF), Advanced Custom Fields (ACF), or Custom Post Type UI can help achieve these configurations, but careful planning is essential to ensure functionality and data integrity.
By understanding the differences between Kentico and WordPress taxonomies and planning accordingly, you can achieve a smooth transition while maintaining content structure and usability.
Initiate content mapping
The content visible on your existing website is deployed using Kentico’s site content tree-based routing method. These pages can contain various media files and structured content within them.
In Kentico, it’s crucial to understand how your content is mapped within the MVC application, as the routing logic is managed by the system. Begin by creating a detailed list of all the pages on your site, including multilingual pages if applicable, and track the associated URLs for each.
Develop a mapping sheet that aligns Kentico content types with their corresponding structures in WordPress. For instance, map Kentico pages to WordPress posts or custom post types. Ensure that all necessary fields (such as: title, body content, images and other media) are accounted for in the new structure.
List all the existing content workflows
Workflows are used in the editing of page content. Audit and document all workflows on your Kentico setup, as these will need to be recreated on WordPress.
For example, when an author drafts an article and submits it for review to an editor. The editor will review the content, make the necessary revisions, and then send it to the head of the relevant department for final approval. Once approved, the head publishes the article, which will be publicly accessible later on the website.
Additionally, note the roles and responsibilities of individuals involved in each workflow. This will help ensure proper access and capabilities are assigned to users in WordPress.
Kentico also offers basic and advanced editorial workflows. Access the workflows application in Kentico to review them and plan how they can be recreated on WordPress.
Mapping your URLs
List all the currently indexed pages and their URLs from your Kentico setup. Each page needs to retain its link on the WordPress site or use a suitable redirect. This way, it will help in preserving the content access for search engine crawlers.
Start by gathering all your link data, and create a link audit spreadsheet. Also, add URLs for multilingual versions of your pages if you have them.
Create a link audit spreadsheet to track all URLs from your Kentico setup, including multilingual versions if applicable. This step is essential to ensure that no content is lost during migration and that your SEO efforts are preserved.
| Content asset | Kentico URL | Redirect, if applicable | Multilingual URL (if applicable) |
| Home page | website.com/about-us | Yes | website.com/about-us/ |
| Blog posts (Number of assets) | /content/blog/article-title | Yes | /fr/content/blog/article-title/ |
| Service pages | /content/service/service-pages-abc | Yes | /fr/content/service/service-pages-abc/ |
The above format will help you efficiently track and plan for redirects, ensuring that your SEO and user experience remain intact during the migration process.
Please note: This format is an example and can be customized based on your specific requirements and site structure.
Audit SEO performance
Migrating your SEO equity is a crucial part of transitioning from Kentico to WordPress. A comprehensive SEO audit will ensure that your rankings and search engine visibility are maintained throughout the migration process.

- Review metadata
Start by auditing and documenting the SEO metadata on your pages. These would cover the meta titles, meta descriptions, alt tags, headings, OG Tags and others. - Review your content, and analyze the performance for categories such as:
- High-performing content that drives traffic and engagement.
- Underperforming content with low traffic and engagement.
- Duplicate content that has similar information.
- Schema markup audit
- Identify existing schema types: Use tools like Google Search Console to catalog the schema types currently implemented on your Kentico site.
- Check for errors: Validate your schema markup using a schema validator to detect any errors or warnings that could affect indexing.
- Analyze pages with and without schema: Ensure that there are no conflicting schema types after migration for the same content.
- Backlinking strategy
Review your backlinks to ensure you’re not losing any valuable inbound links during the migration. Identify key backlinks pointing to your Kentico site and ensure the URLs are preserved or redirected correctly. Consider using tools like Ahrefs or SEMrush to help track these backlinks. - Document SEO findings
Use Google Search Console (GSC) to gather data on current rankings, errors, and structured data.
This detailed documentation will ensure that your SEO equity is preserved during the migration, maintaining your site’s search engine visibility and performance.
Audit user behavior
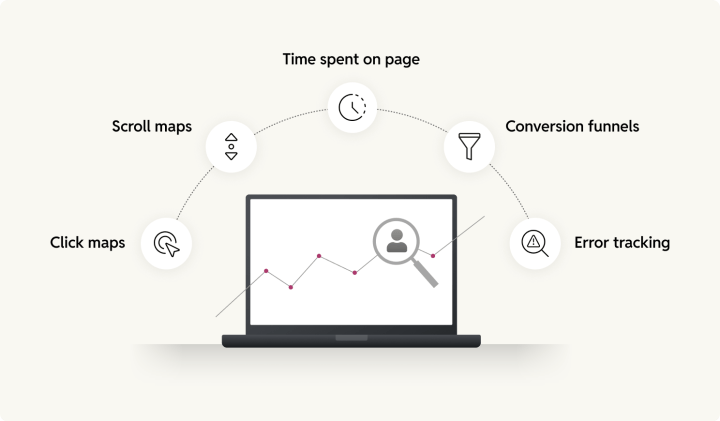
Before migrating to WordPress, it’s crucial to audit and understand your current website’s user behavior. By analyzing your current user interactions on your Kentico site, you can set a baseline for comparison and identify areas for improvement in the WordPress migration. Here’s how:
- Click maps: Where users click most, like buttons, links, and images.
- Scroll maps: How far users scroll, to determine the right placement of important content.
- Time spent on page: How long do your users currently stay on pages.
- Conversion funnels: User journeys and drop-offs.
- Error tracking: Technical issues that are currently affecting user experience.
Performance audit
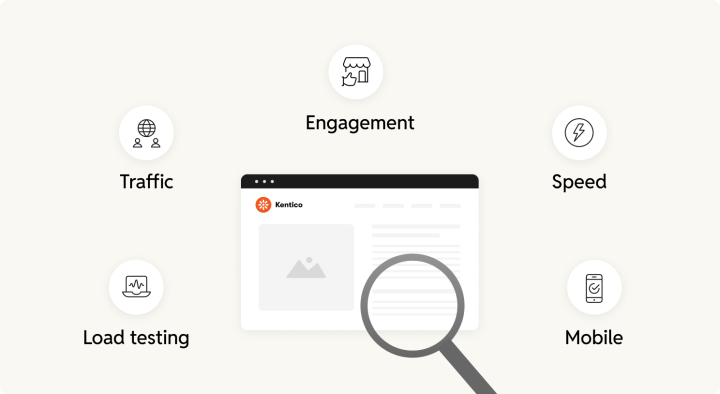
List and review all the metrics currently affecting your website growth and reach. These performance snapshots will set the benchmark for your upcoming WordPress stack, and also help you realize the impact of the migration project.
Traffic analysis and user behavior
Using tools like Google Analytics, to understand which pages and sections of the site are most valuable in terms of traffic and engagement. High-traffic pages should be prioritized during the migration to ensure their content is accurately transferred, while low-traffic pages can be evaluated for content refreshes or removal.
- Key metrics: Pay attention to metrics like heat maps, engagement rate, and average session duration to understand which pages are resonating with your audience.
- User flow: Evaluate how users are navigating the site, especially any unique interactions or user journeys that should be preserved on the new site.
Page speed testing
Once you have listed down all the pages and know the content tree organization. You will have to test these pages with tools of your choice. You could use Google’s free page speed analysis tool to measure your site’s current loading times which can be later used to compare with your new WordPress stack’s performance.
Mobile usability check
Check for mobile friendliness, if the website is configured for mobile devices.
Load testing
Carry out spike testing, to see how your current Kentico setup responds to traffic spikes. Which can occur during promotional events and seasonal traffic. This process will help you identify ways to optimize your new WordPress stack for better performance during high-traffic periods.
