
Migrating from Drupal to WordPress: A Step-by-Step Guide
Follow these essential steps to smoothly transition from Drupal to WordPress. Each step prepares you for a seamless migration, helping you tackle challenges and ensure efficiency
WordPress installation
After fully preparing your content and Drupal site for migration, the next step is to transition to the WordPress platform. Begin by downloading and installing WordPress, a process that is quite simple. For guidance, you can consult the official documentation.
Set up a permalink structure in WordPress
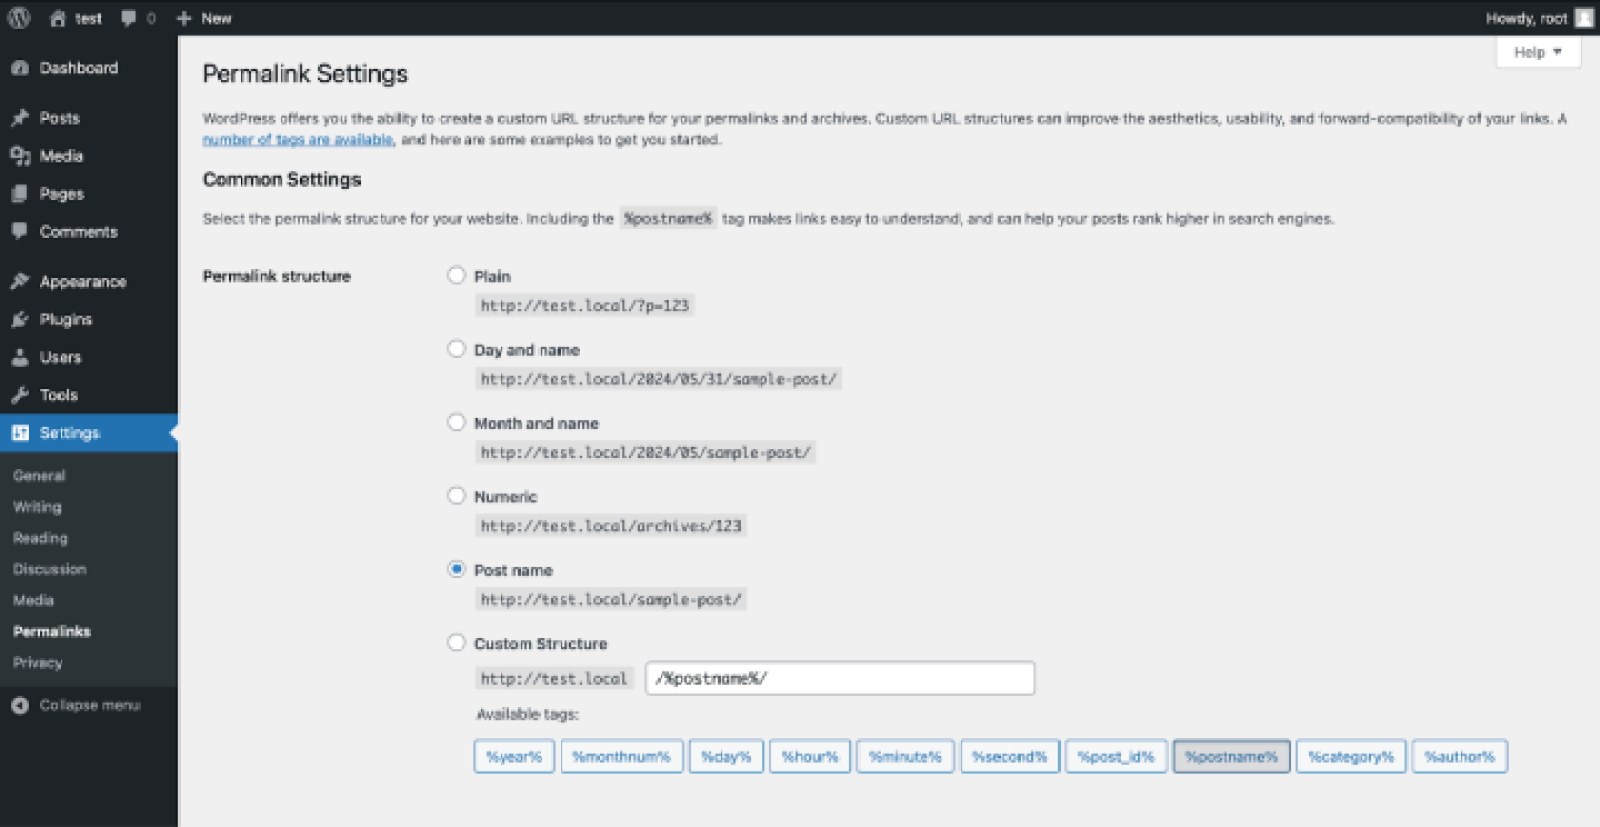
After migrating to WordPress, your content URLs may lose their previous structure from Drupal, reverting to the standard WordPress format. To create user-friendly URLs, you need to adjust the permalink settings in WordPress.
To modify the permalink structure, navigate to Settings > Permalinks in your WordPress dashboard. We recommend choosing the “Post name” option.
This “Post name” format allows you to create custom permalinks for each page and post. While you have the option to set up a different URL structure, the “Post name” choice is typically suitable for most websites, as it utilizes the title of your post for the URL.
Migrating content from Drupal to WordPress
With your WordPress environment fully set up, it’s time to begin the actual Drupal to WordPress data migration process. Let’s bridge the gap between Drupal and WordPress through the use of plugins.
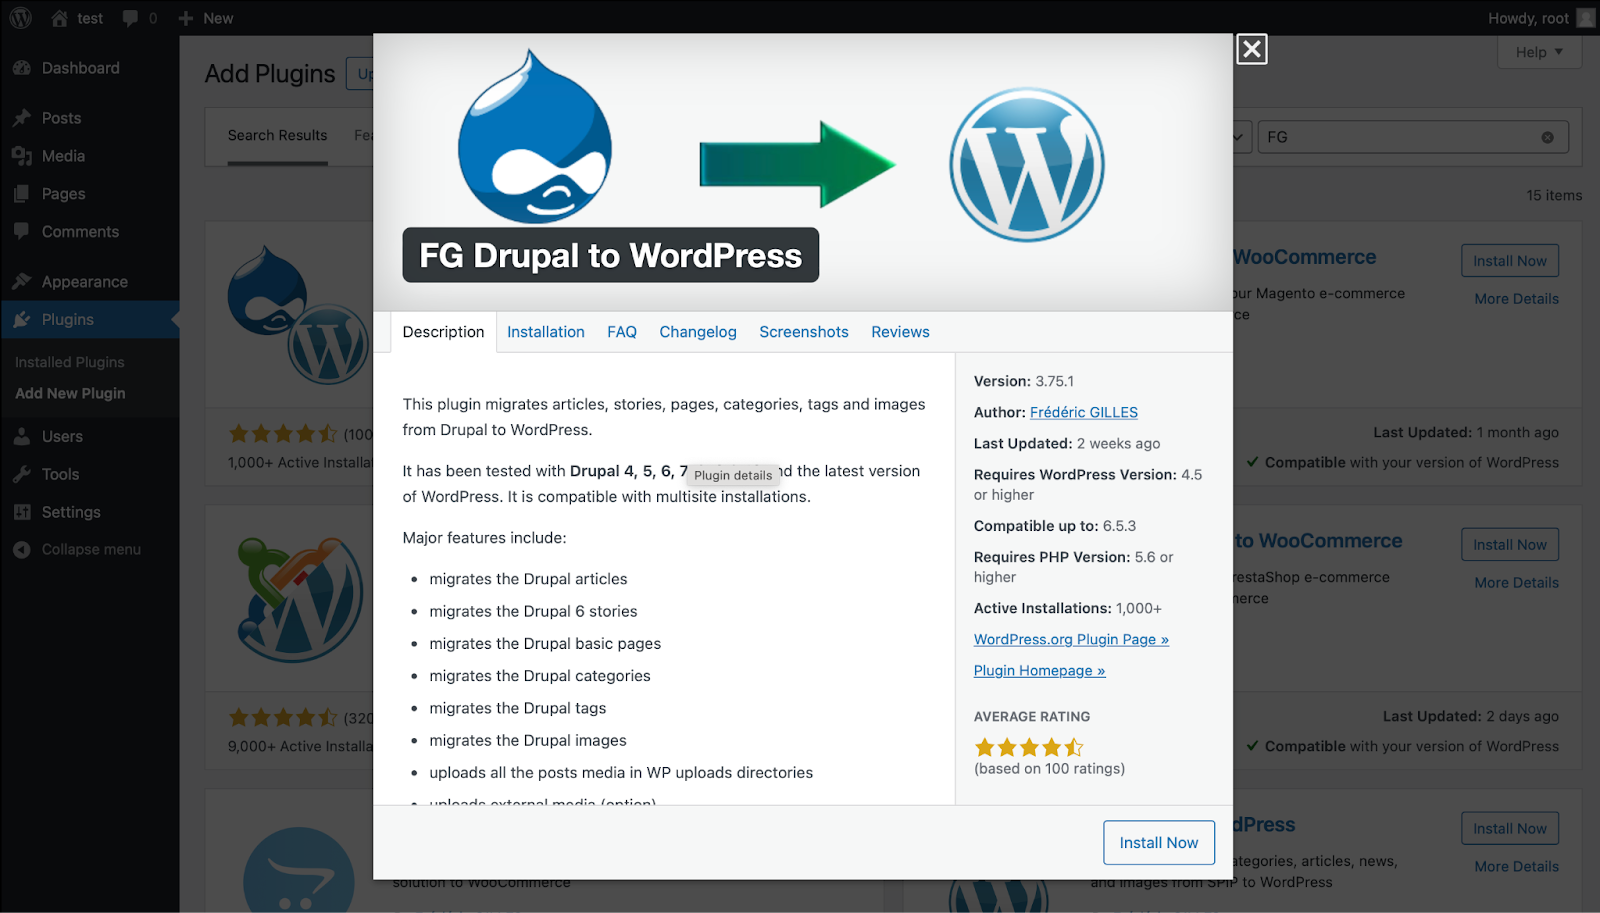
1. Install the FG Drupal to WordPress Plugin
The first step in your migration process is to install the FG Drupal to WordPress plugin on your new WordPress site. This plugin serves as a bridge, facilitating the seamless transfer of your content—including articles, images, videos, and more. It is compatible with all versions of Drupal and supports multisite configurations too, This Drupal to WordPress migration tool ensures a really smooth transfer process.
The free version of the FG Drupal to WordPress plugin is an excellent starting point, but it has some limitations. It may not support the migration of custom content types unique to your Drupal site, user accounts and their associated data, or advanced SEO features like URL redirects. To access these features, you will need to upgrade to the paid version of the plugin.
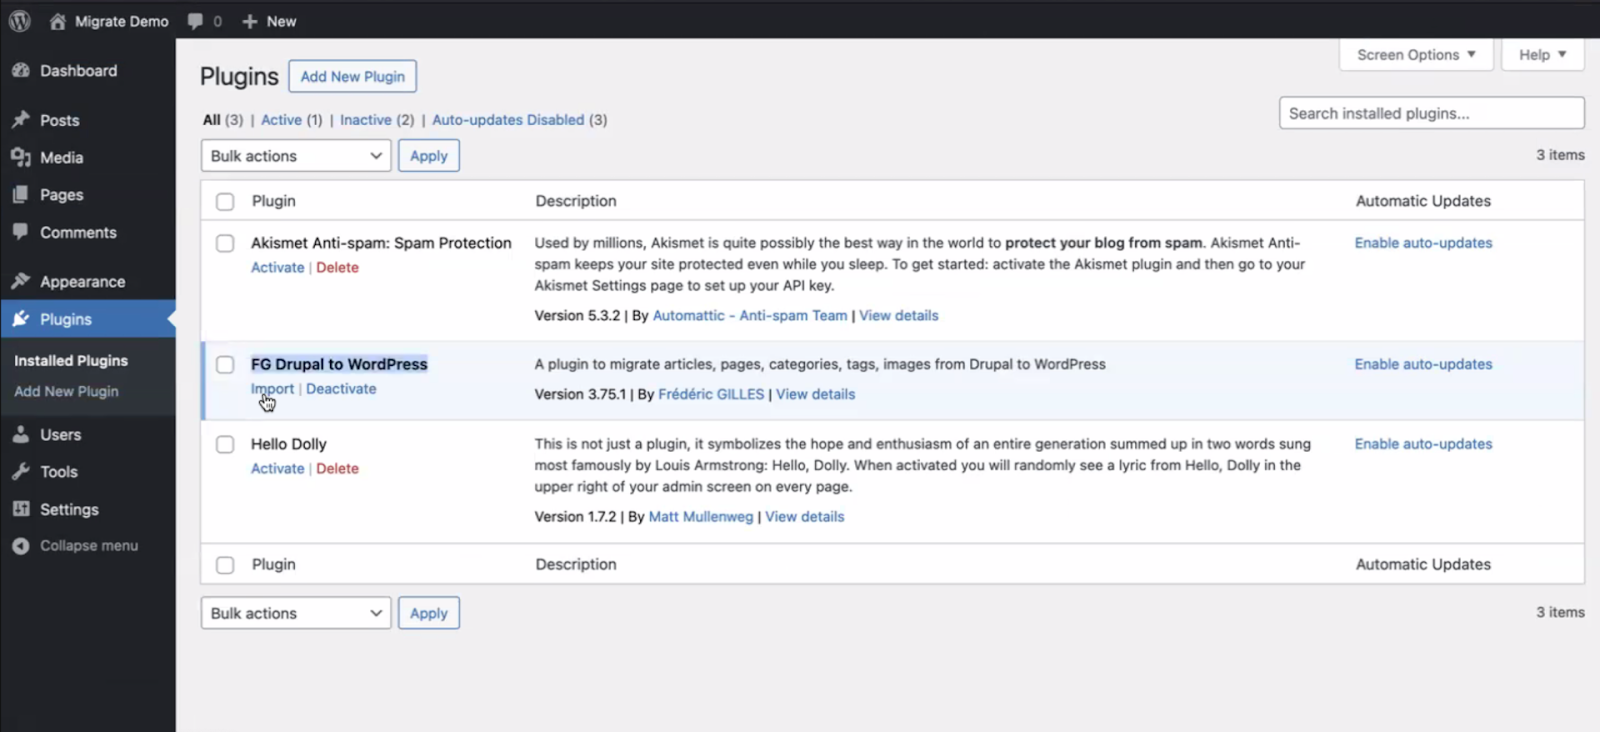
- After installing the FG Drupal to WordPress plugin, find the “Import” option in your WordPress dashboard.
- Click on it to begin the migration process.
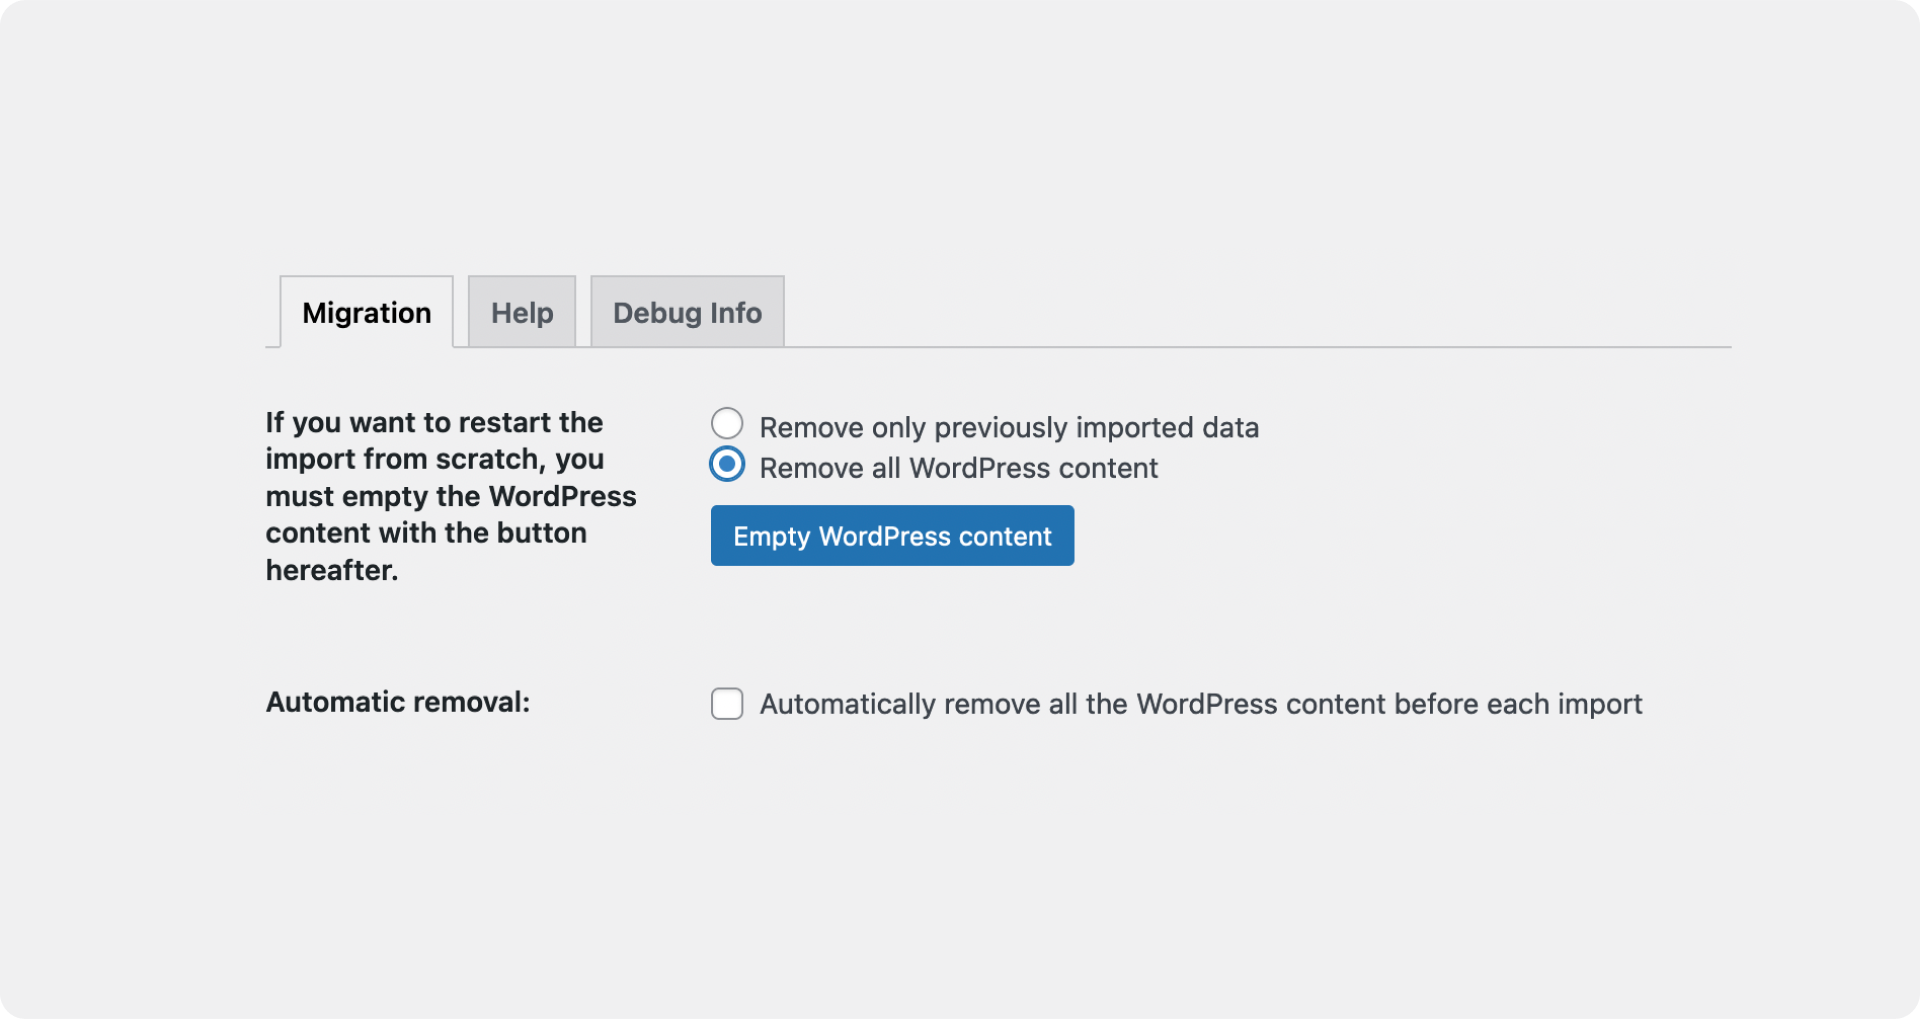
2. Clean up the existing content
Before you start, remove any unwanted or duplicate content from your WordPress site, especially if you have already migrated some content (In case if you have attempted migration before). This ensures a smoother migration process. The plugin may provide options to automatically delete existing content that matches what you’re importing from Drupal.
3. Enter your Drupal website URL
- Provide the URL of your existing Drupal website, from which the plugin will fetch the content to be migrated.
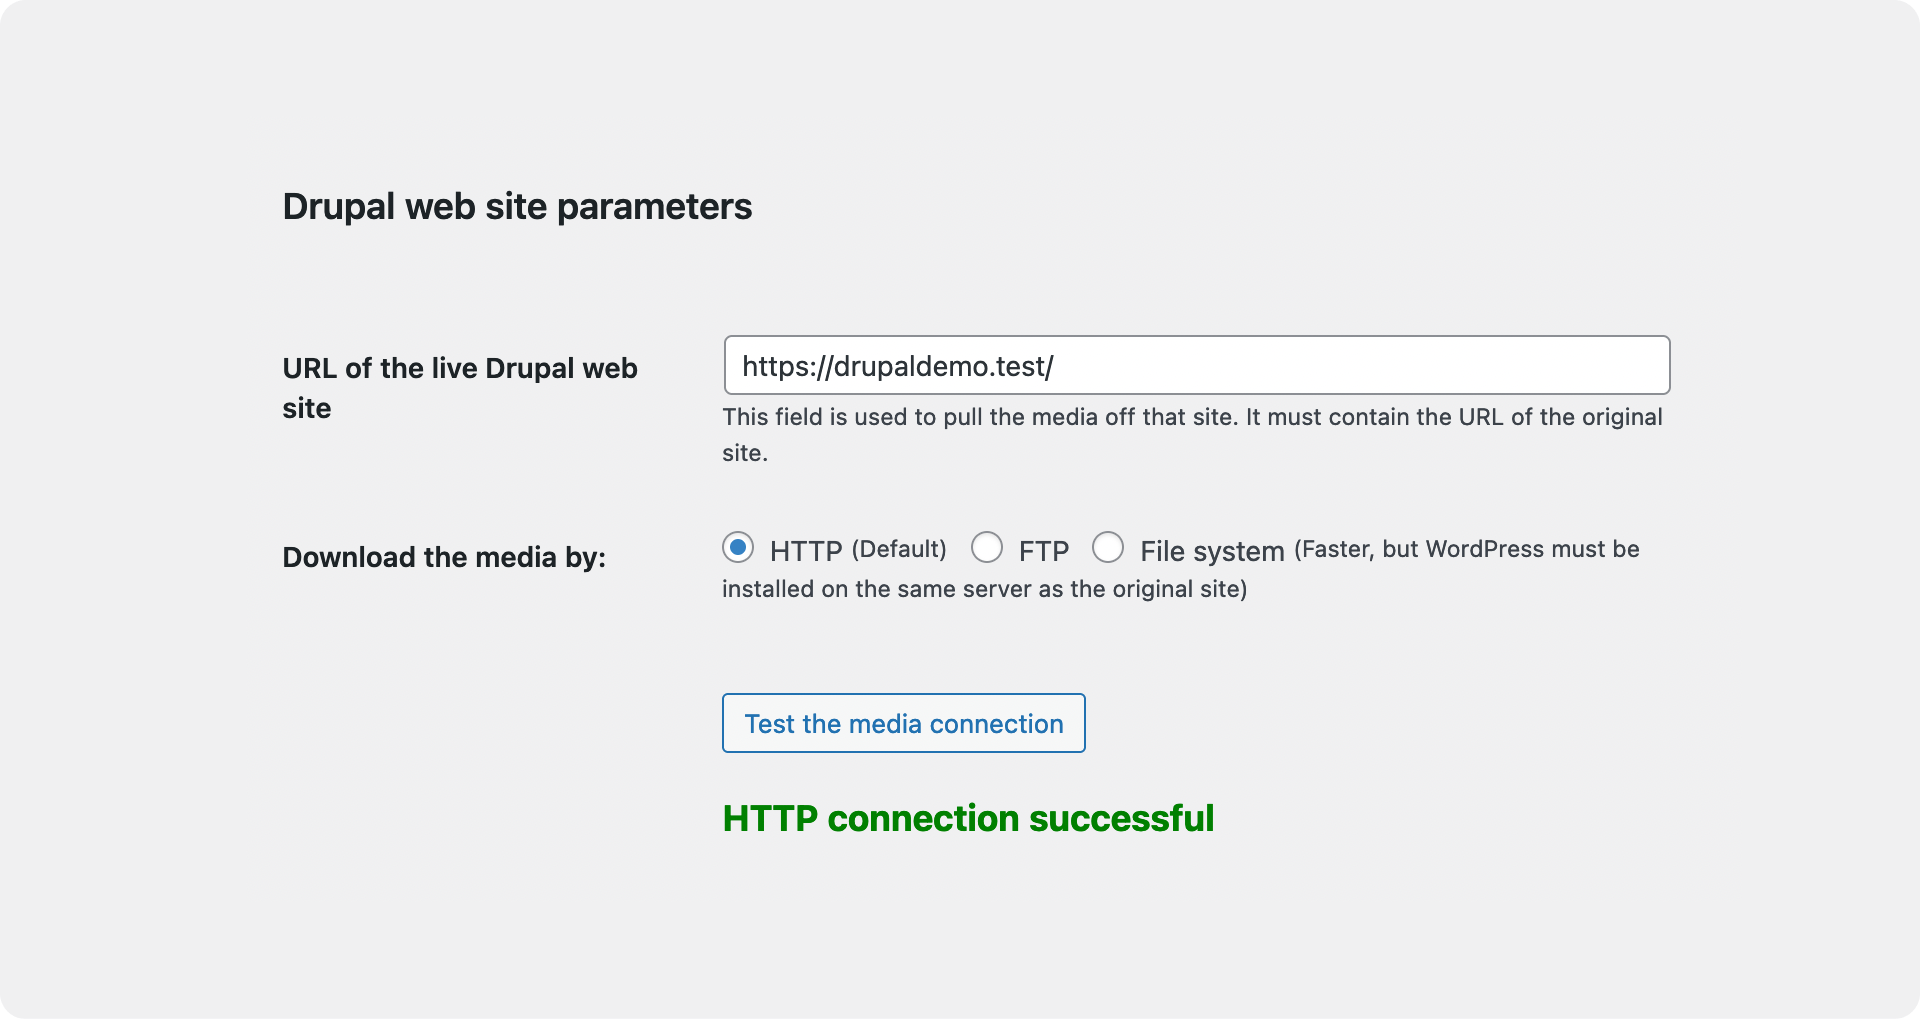
4. Choose a media download method
- The plugin will download your media files (images, videos, etc.) from your Drupal website.
- Select the method that best suits your situation.
5. Connect your Drupal website to the migration plugin
Step 1: Locate your Drupal website’s URL
Go to your Drupal website and copy its URL from the address bar.
Step 2: Enter your Drupal credentials
Access your website’s files: Use an FTP client or file manager to connect to your web server.
Navigate to the Drupal folder: Locate the folder where your Drupal website is installed. It’s often named something like “public_html/your_drupal_folder”.
Find the settings.php file: Inside the “sites” folder, go to the “default” folder and find the “settings.php” file.
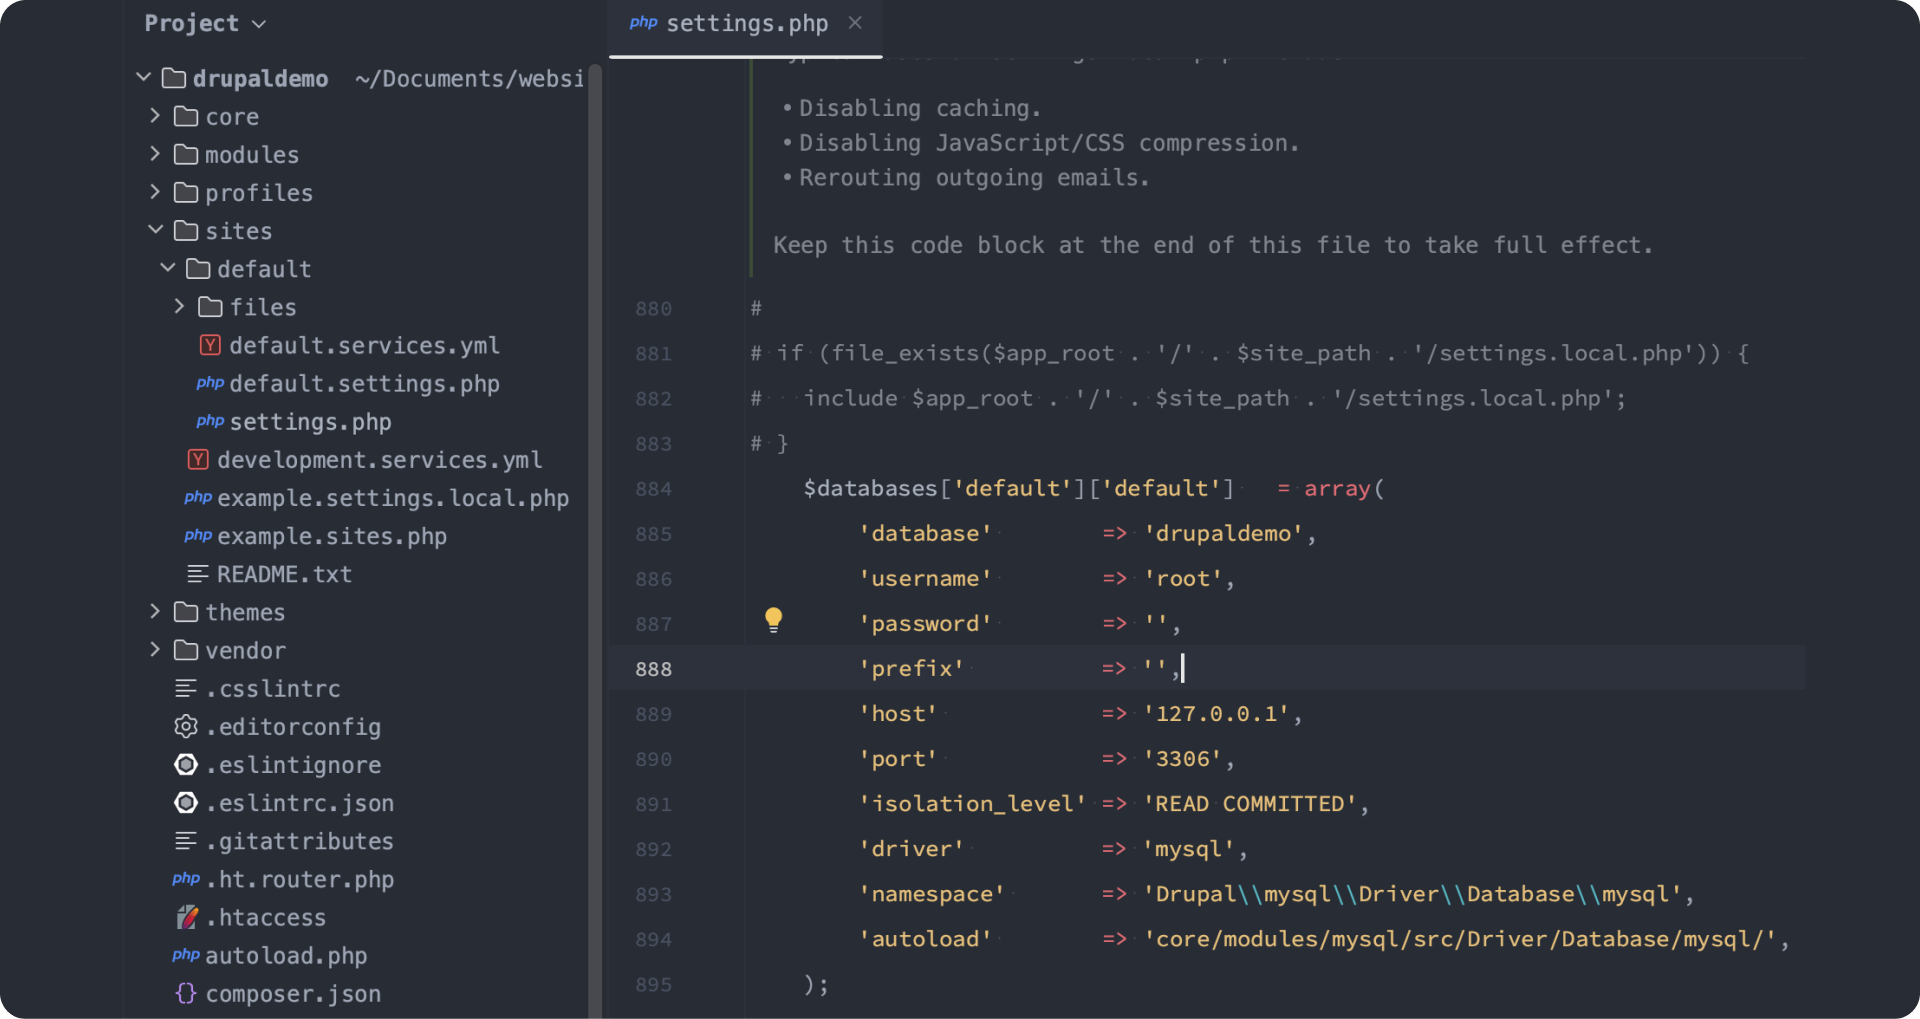
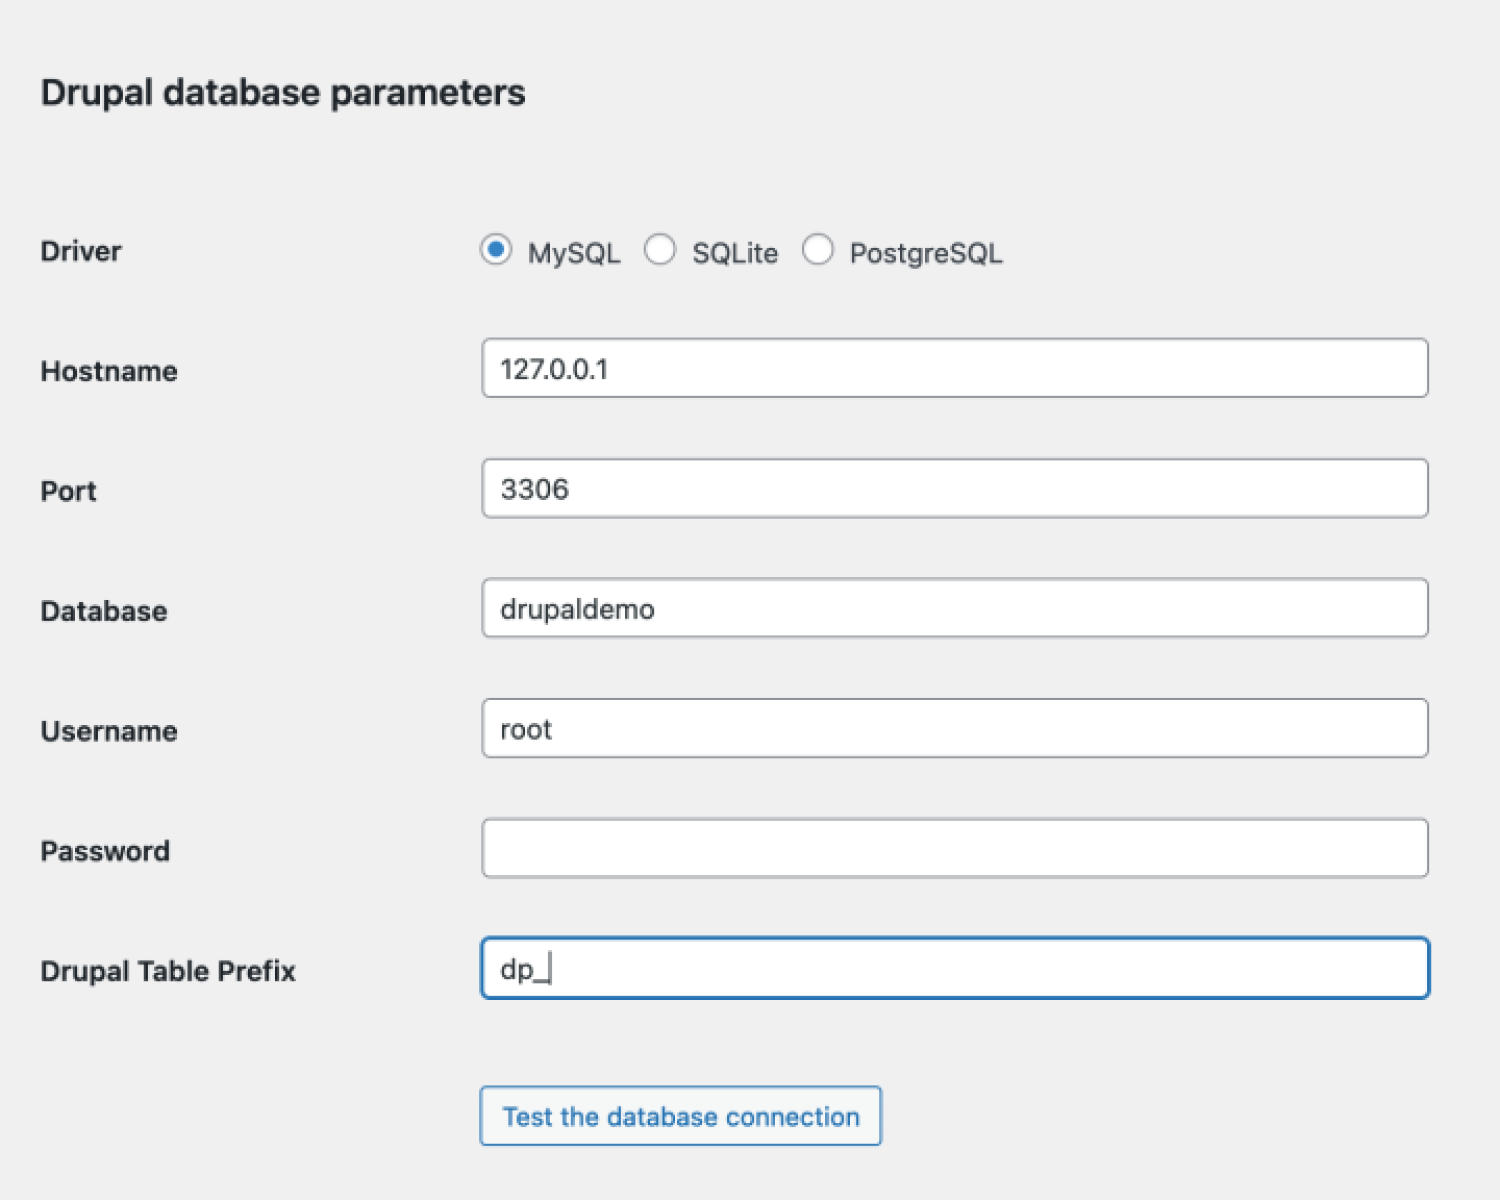
Step 3: Provide database information
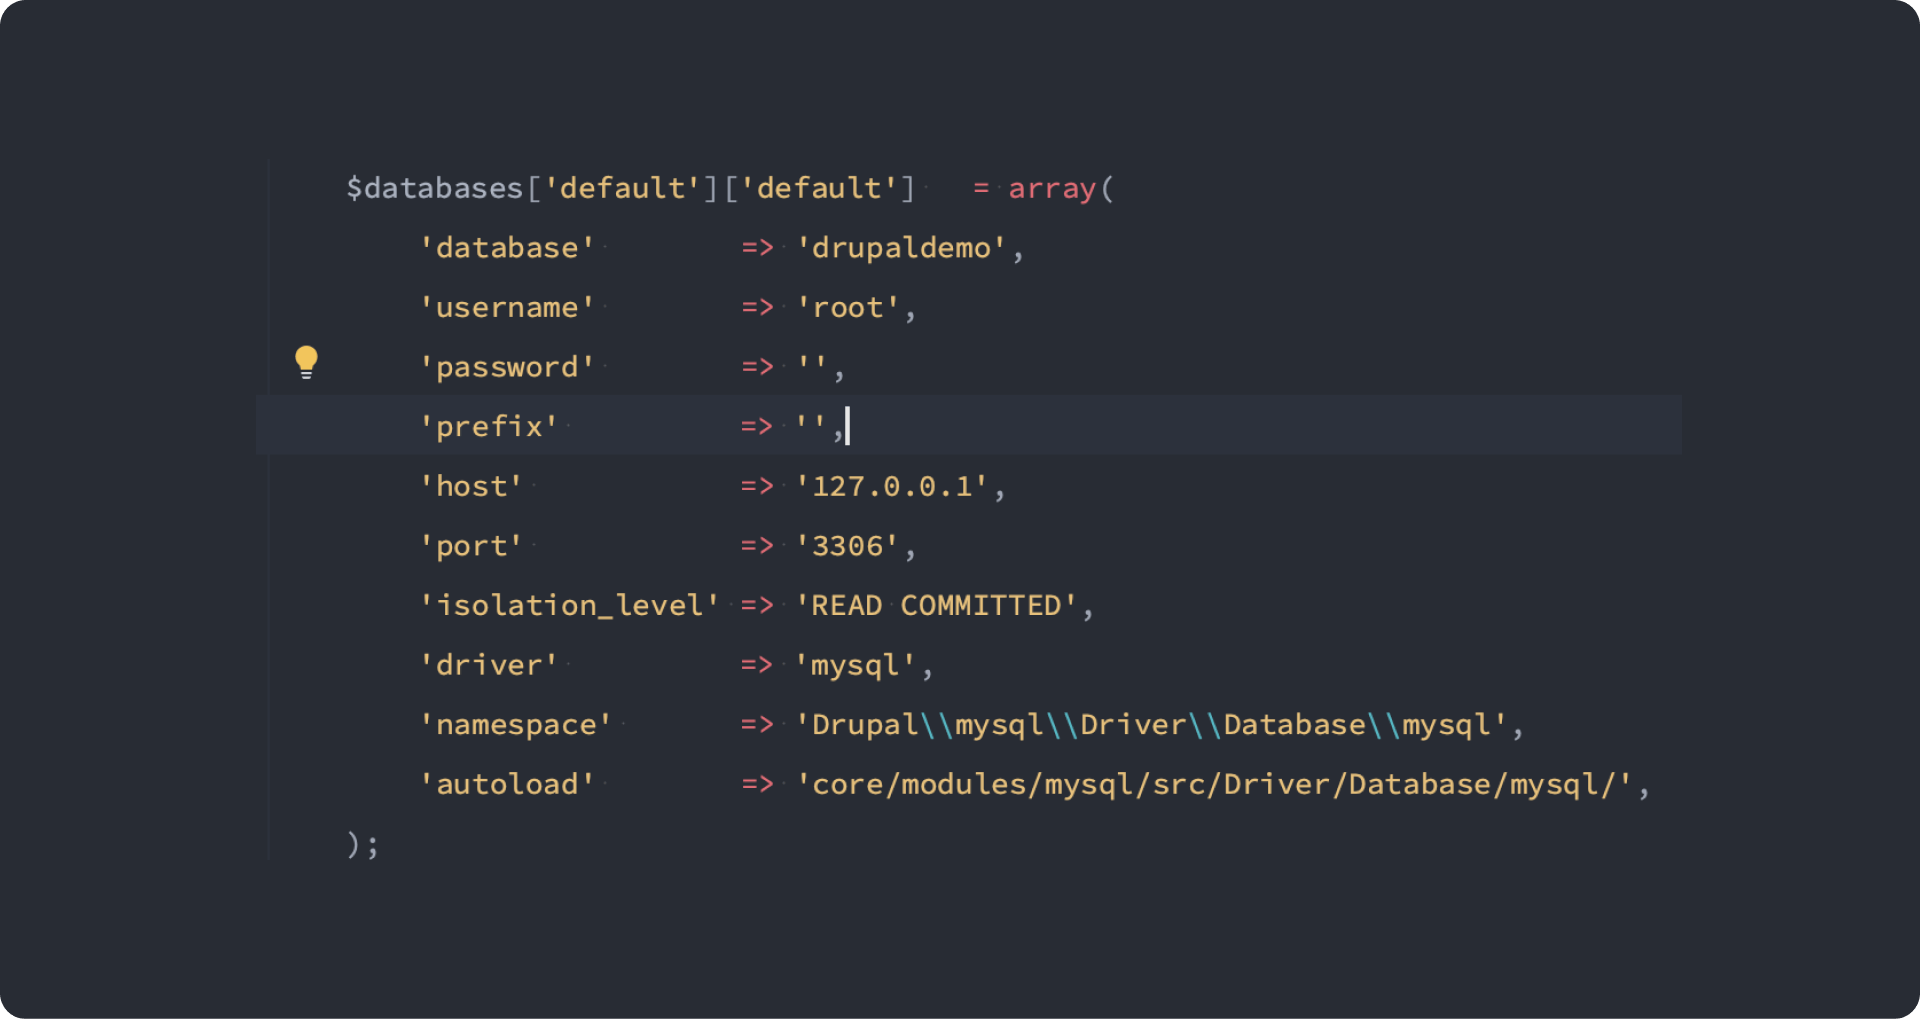
Copy and paste credentials: In the migration plugin, enter the following information from the “settings.php” file:
- Database host: The address of your database server.
- Database name: The name of your Drupal database.
- Database username: The username used to access the database.
- Database password: The password for the database user.
Step 4: Test the database connection
Verify settings: Click the “Test the Database Connection” button in the plugin.
Check for success: If the connection is successful, you’ll see a positive message.
Remember:
Include the underscore: When entering the table prefix, make sure to include the underscore at the end.
Step 5. Customizing your migration with the “Behavior” section
- The plugin’s “Behavior” section lets you customize the migration process. Choose which content types to move, whether to copy or link images, and even if you want to migrate user accounts.
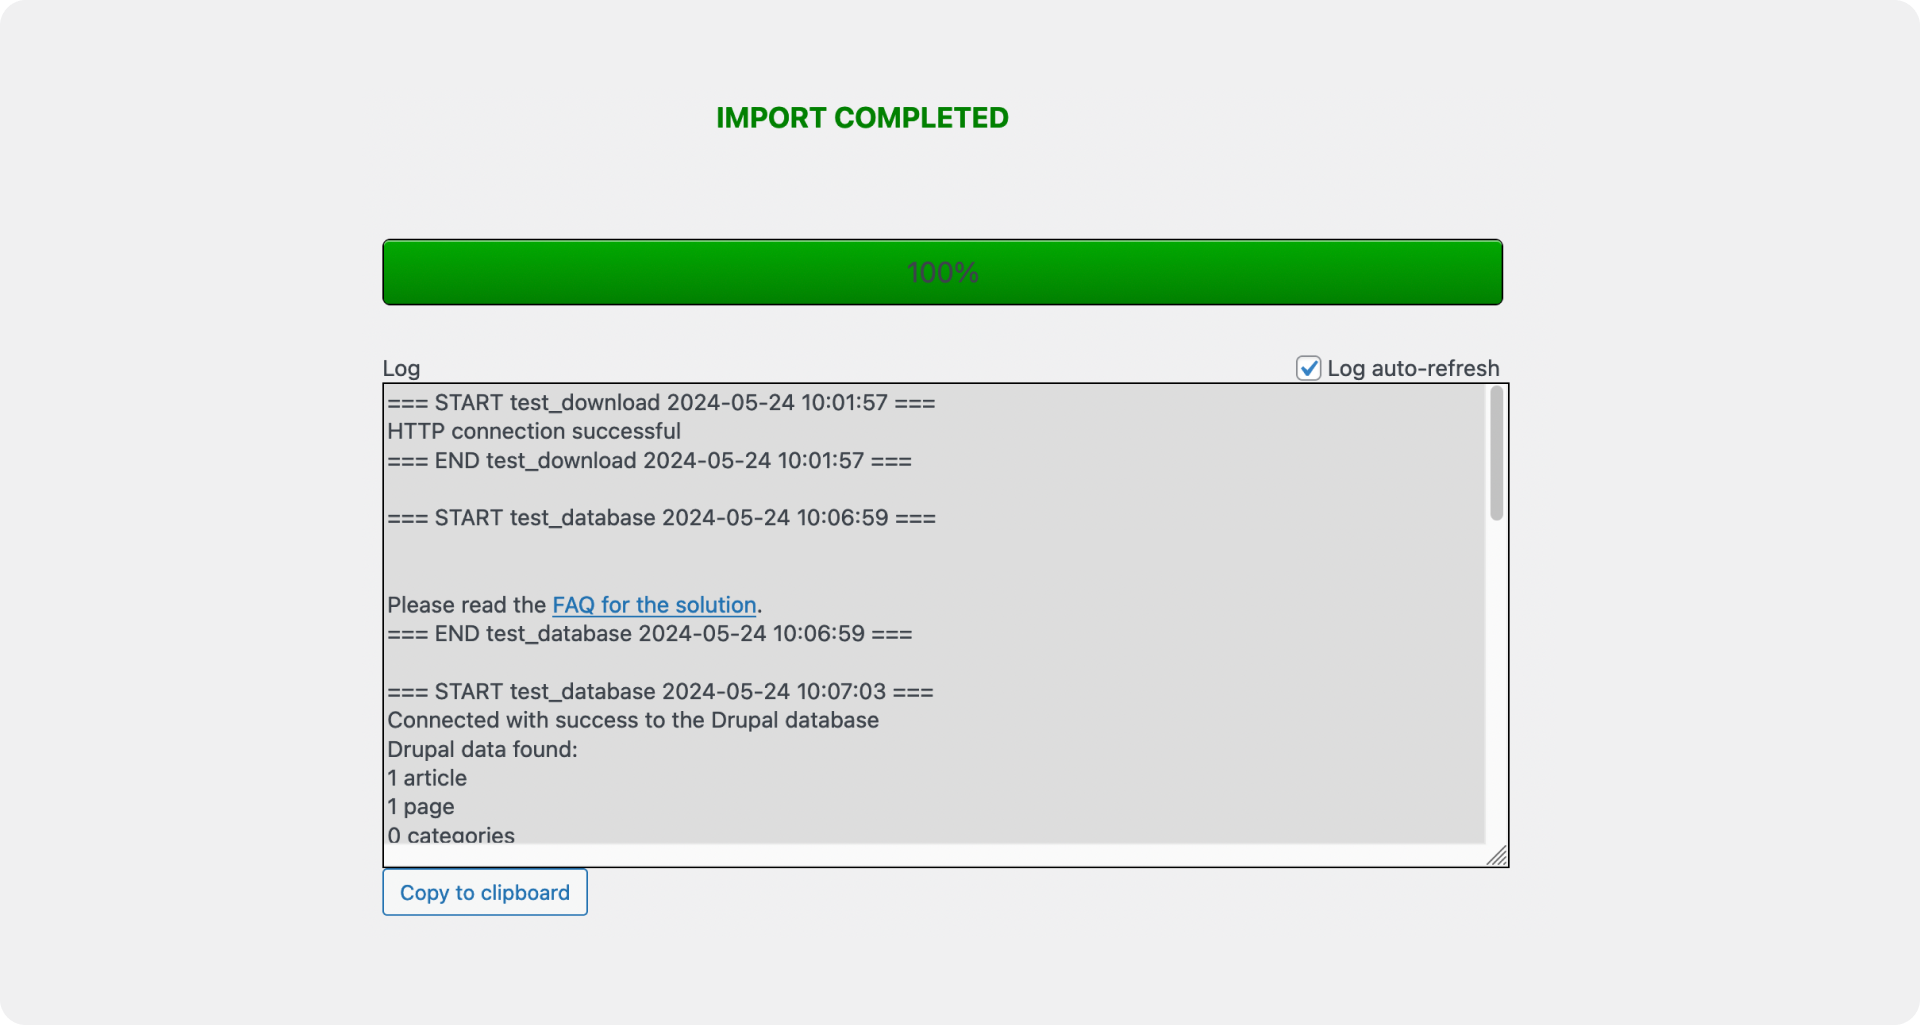
- Once you’ve adjusted these preferences, click “Start/Resume Import.” The plugin will automatically handle the migration, transferring your old content to the new WordPress website. The time it takes depends on the amount of content being moved, but the plugin will keep you updated on its progress.

When the migration is complete, you’ll receive a notification.
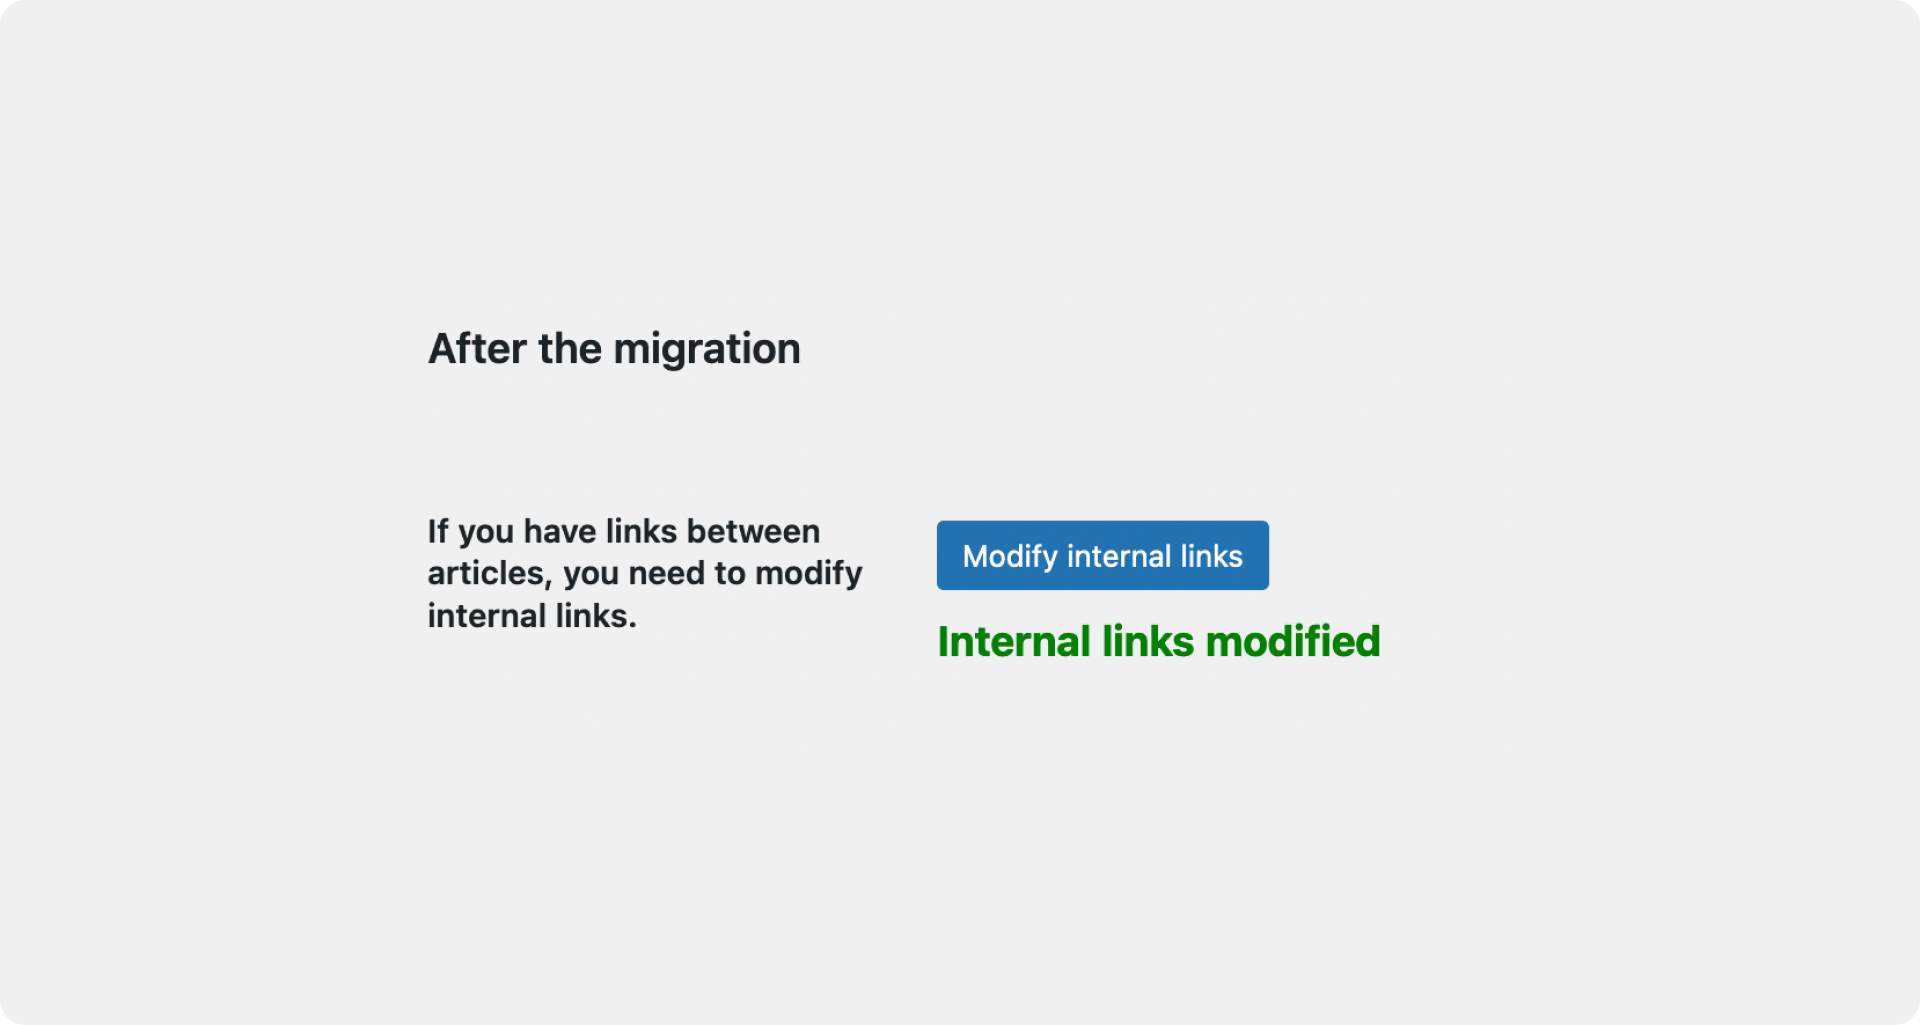
Step 6. Don’t forget to update internal links after the migration.
After the main migration, there’s one last thing to do. If your old Drupal website had a lot of links pointing to other pages on the same website, those links might be broken now.
Click the “Modify Internal Links” button on your WordPress site to automatically detect and fix any broken internal links from the migration. This tool is especially useful if you’ve changed your permalink structure or added redirects.
Content migration in Drupal to WordPress
Below you’ve a side-by-side comparison highlighting the content on both the original Drupal site and the newly migrated WordPress site. This example highlights the successful migration process. Some minor differences may appear, as content is displayed according to the active WordPress theme after the migration, which is a normal outcome.

Updating your website’s address
After validating your content transfer, the final step is to update your website’s address (DNS) so that visitors are directed to the new WordPress site instead of the old Drupal one.
Here’s a quick guide:
- Log in to your domain registrar’s account.
- Find the DNS settings.
- Modify the DNS records. Update them to point to your new WordPress website’s IP address.
Most domain registrars offer detailed instructions and support. By updating your DNS settings, you’ll ensure a smooth transition for your visitors.
Creating a new sitemap for your WordPress site
While moving from Drupal to WordPress, it’s important to create a new sitemap for your WordPress site. A sitemap is like a map that helps search engines understand your website’s structure and content.
Here’s why creating a new sitemap is beneficial:
- Improved search engine visibility: A fresh sitemap helps search engines understand the migration process, potentially minimizing any negative impact on your website’s ranking.
- Flexibility for URL changes: If your website’s URLs change during the migration, a new sitemap ensures search engines have the most accurate information, leading to better indexing.
By creating a new WordPress sitemap, you ensure that search engines recognize you have moved from Drupal to WordPress.
If you are considering migrating to WordPress and looking for Drupal to WordPress migration services, feel free to reach out to us.
