Introducing the Sitemap.XML feature in our Visual Automation Framework to conveniently test websites with multiple URLs. It streamlines the testing process, reduces manual efforts, and improves the efficiency and accuracy of the testing workflow.
A website’s success hinges on its performance, functionality, and user experience. And as websites grow in size and complexity, testing every nook and cranny becomes a tedious task.
With years of experience in this domain, we know that the conventional methods of creating CSV files or manually adding URLs for testing are time-consuming, error-prone, and far from ideal for enterprise websites.
To achieve better efficiency and accuracy, we are pleased to introduce the Sitemap.XML feature to our existing Visual Automation Framework. By utilizing this functionality, you can streamline the process of extracting URLs from the sitemap.xml file and transferring them to the output.csv file, while efficiently executing tests and generating reference screenshots.
This feature can be easily incorporated into your visual automation workflows, ensuring real-time updates, ease of scalability, automation, saving time and bringing down the overall cost.
Sitemap.XML – Easy to Install and Configure
The Sitemap.XML feature is easy to configure. Follow the steps outlined below to configure it in your environment.
- Clone the Visual Automation repository: The first step is to clone the repository for Visual Automation onto your local machine. You can use Git to clone the repository from the remote repository URL.
- Install dependencies: Navigate to the cloned repository directory using the command line or terminal. Next, execute the npm install command to download and install the required packages and libraries.
- Create .env file: In the project’s main directory, create a file named .env. This file will be used to store configuration variables.
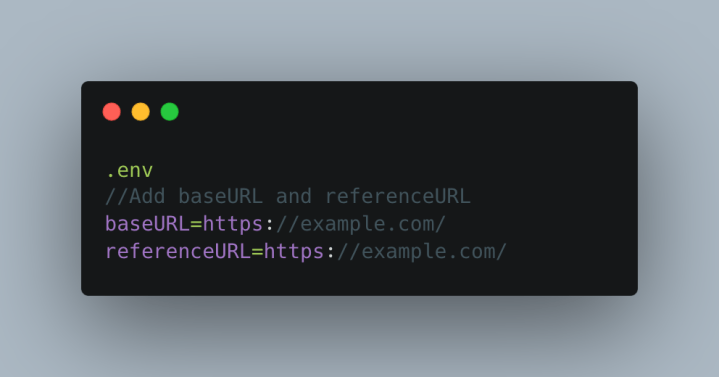
- Enter configuration details: Open the .env file in a text editor. In the .env file, you need to define two variables, baseUrl and referenceUrl. Set the baseUrl variable as the base URL of your website and the referenceURL variable as the URL of the site to which you want to compare your baseUrl. baseUrl and referenceUrl are the starting points from which the Sitemap.XML feature will fetch URLs.
Let’s see how your .env file will look. The below image shows how the baseURL and referenceURL variables are defined. You can replace the URLs with your own website’s URL.
For more detailed instructions on configuring the Sitemap.XML feature, check out the Readme file in the repository.
Execute Visual Automation Tests
Follow the steps below to generate reference screenshots, perform visual automation tests, and access the HTML report. This will help you analyze the results and make the necessary adjustments to your website to achieve the desired visual consistency and quality.
- Launch the command line or terminal, and navigate to the project’s main directory.
- Execute the npm run reference:xml command to initiate reference screenshots generation.
- The process will first generate an output.csv file. This file contains all the URL slugs available on your website, fetched from sitemap.xml.
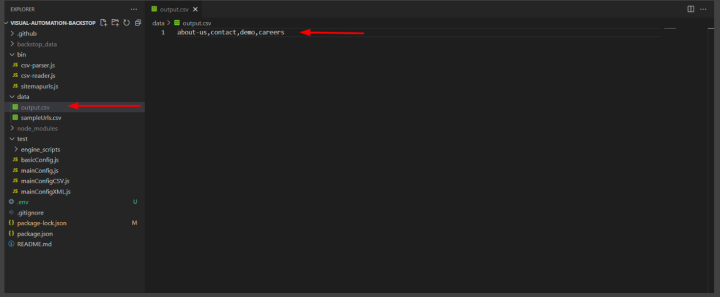
- The visual automation will then be executed on each URL slug listed in the output.csv file. This process involves taking screenshots of each URL and saving them as reference screenshots.
- Once the execution of the reference command is completed, you can run the command npm run test:xml. This command will initiate the comparison between base site screenshots and reference screenshots.
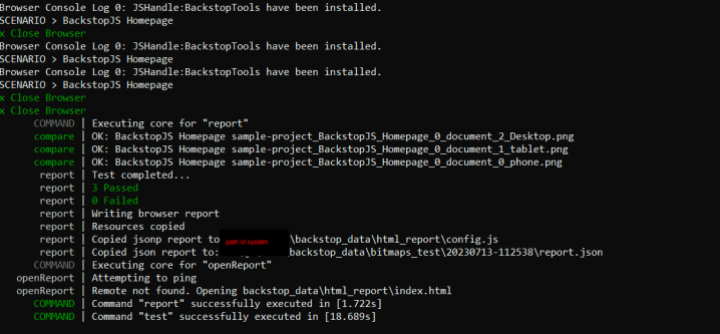
- The test execution will compare the current state of the website (the base site) with the reference screenshots taken earlier. This process will detect visual differences between the base site and the reference screenshots.
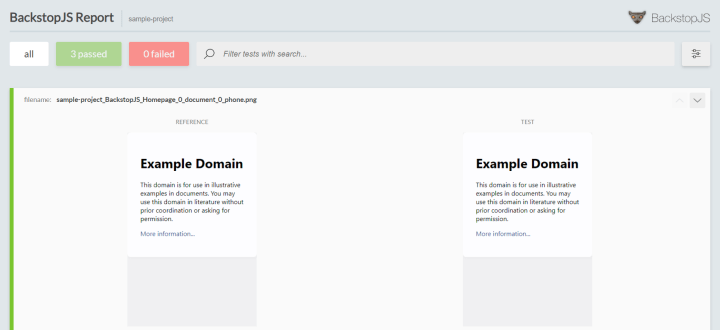
- After the test execution is completed, you can find the HTML report under the backstop_data/html_report directory. This report will provide detailed information about visual differences found during the test, thus allowing you to identify and address any discrepancies.
Updating the Framework
To update the framework, you can follow these general instructions:
Check out the basic-framework branch by executing the following command:
git checkout basic-frameworkOnce you are on the basic-framework branch, pull the latest changes from the branch by executing the following command:
git pull origin basic-frameworkThis will fetch the latest changes from the “basic-framework” branch and update your local repository.
Note: The above instructions assume you have an old Visual Automation Framework installed and configured.
After updating your framework, you can proceed to test it.
Conclusion
In conclusion, the introduction of the Sitemap.XML feature in our Visual Automation Framework marks a significant advancement in website testing capabilities. We aim to assist you in achieving a successful website with top-notch performance, functionality, and user experience. With the Sitemap.XML feature, testing becomes a seamless and time-saving task, enabling real-time updates and effortless scalability. Configuring the feature is straightforward, and the accompanying HTML report provides detailed insights for resolving any visual discrepancies.
We continuously strive to improve our Visual Automation Framework to achieve bug free implementations for enterprise websites. If you have any feedback or suggestions, feel free to raise tickets, and collaborate with us on refining and expanding this feature. Happy testing!
On this page


Leave a Reply