In this tutorial we will show you how to configure CDN on cdn77.com with W3 TOTAL CACHE.
Configuring CDN with CDN77 on your WordPress is really easy with some simple steps:
- Go to cdn77.com and login there.
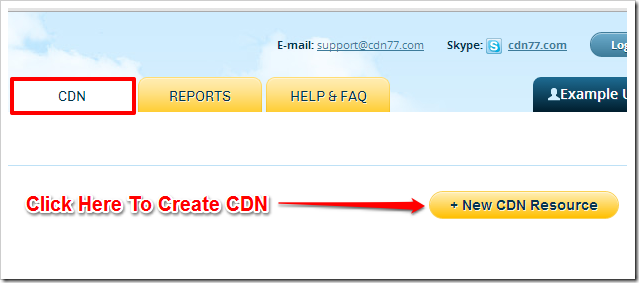
- Under CDN tab click on New CDN Resource.
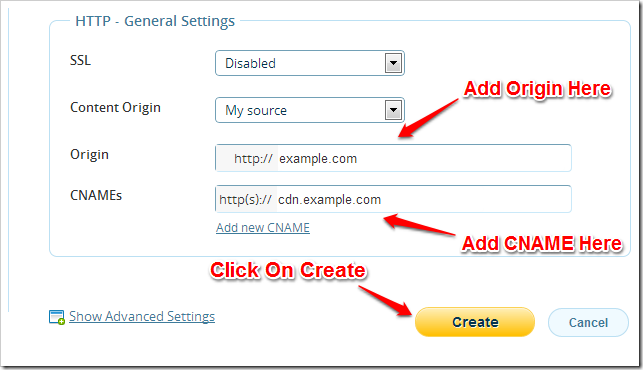
- Under Original section, enter your hostname where you want to configure CDN.
- Under CNAMEs section, enter CDN hostname e.g. cdn.example.com (You can choose any name of your choice).
- Again go to CDN tab, you can see newly created CDN there, click on manage button.
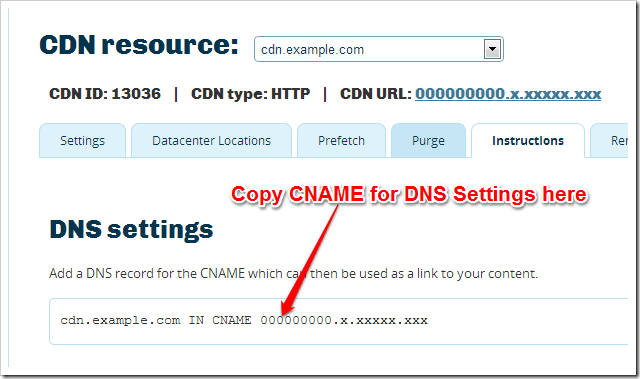
- Go to Instructions tab and copy CNAME Record for DNS Settings, your host will be cdn.example.com.
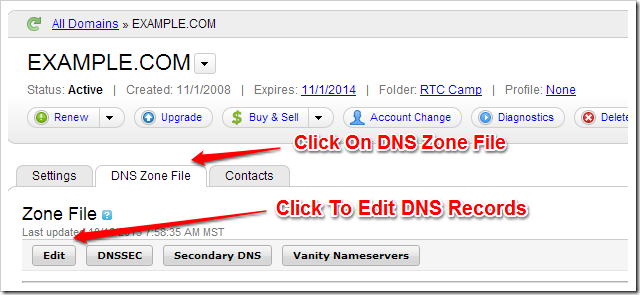
- Go to domain registration account where your website is registered (We are taking example of GODADDY).
- Go to DNS Zone file, click on Edit button.
- Under CNAME section click on Quick Edit.
- Add cdn hostname under Host Section and add CNAME Record (that you copied while creating CDN) under Points to Section.

- Now go to your WordPress Website’s admin page and then go to W3 TOTAL CACHE General Settings.
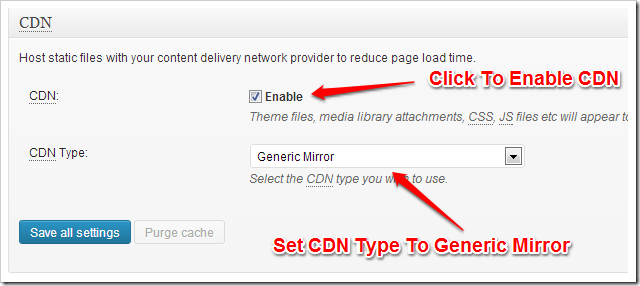
- Under CDN Section Click on Enable checkbox and set CDN Type to Generic Mirror.
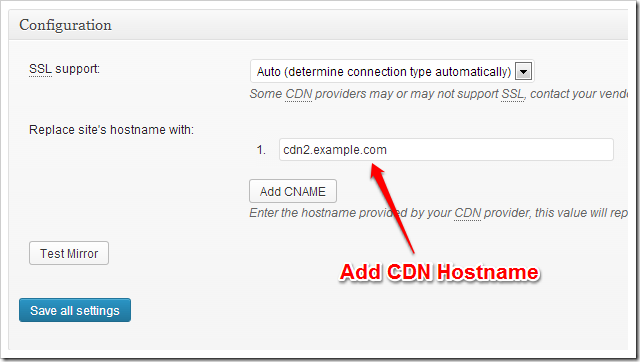
- Now Go to Performance > CDN and add your CDN Hostname there.
- Click on Save settings.
Now you have configured CDN on CDN.NET with W3 Total Cache.